Niagara Falls from the Canadian Side: A Photographer's Field Guide
How to shoot Horseshoe Falls without the crowds — best light, vantage points, gear, and the mistakes I made so you don't have to.
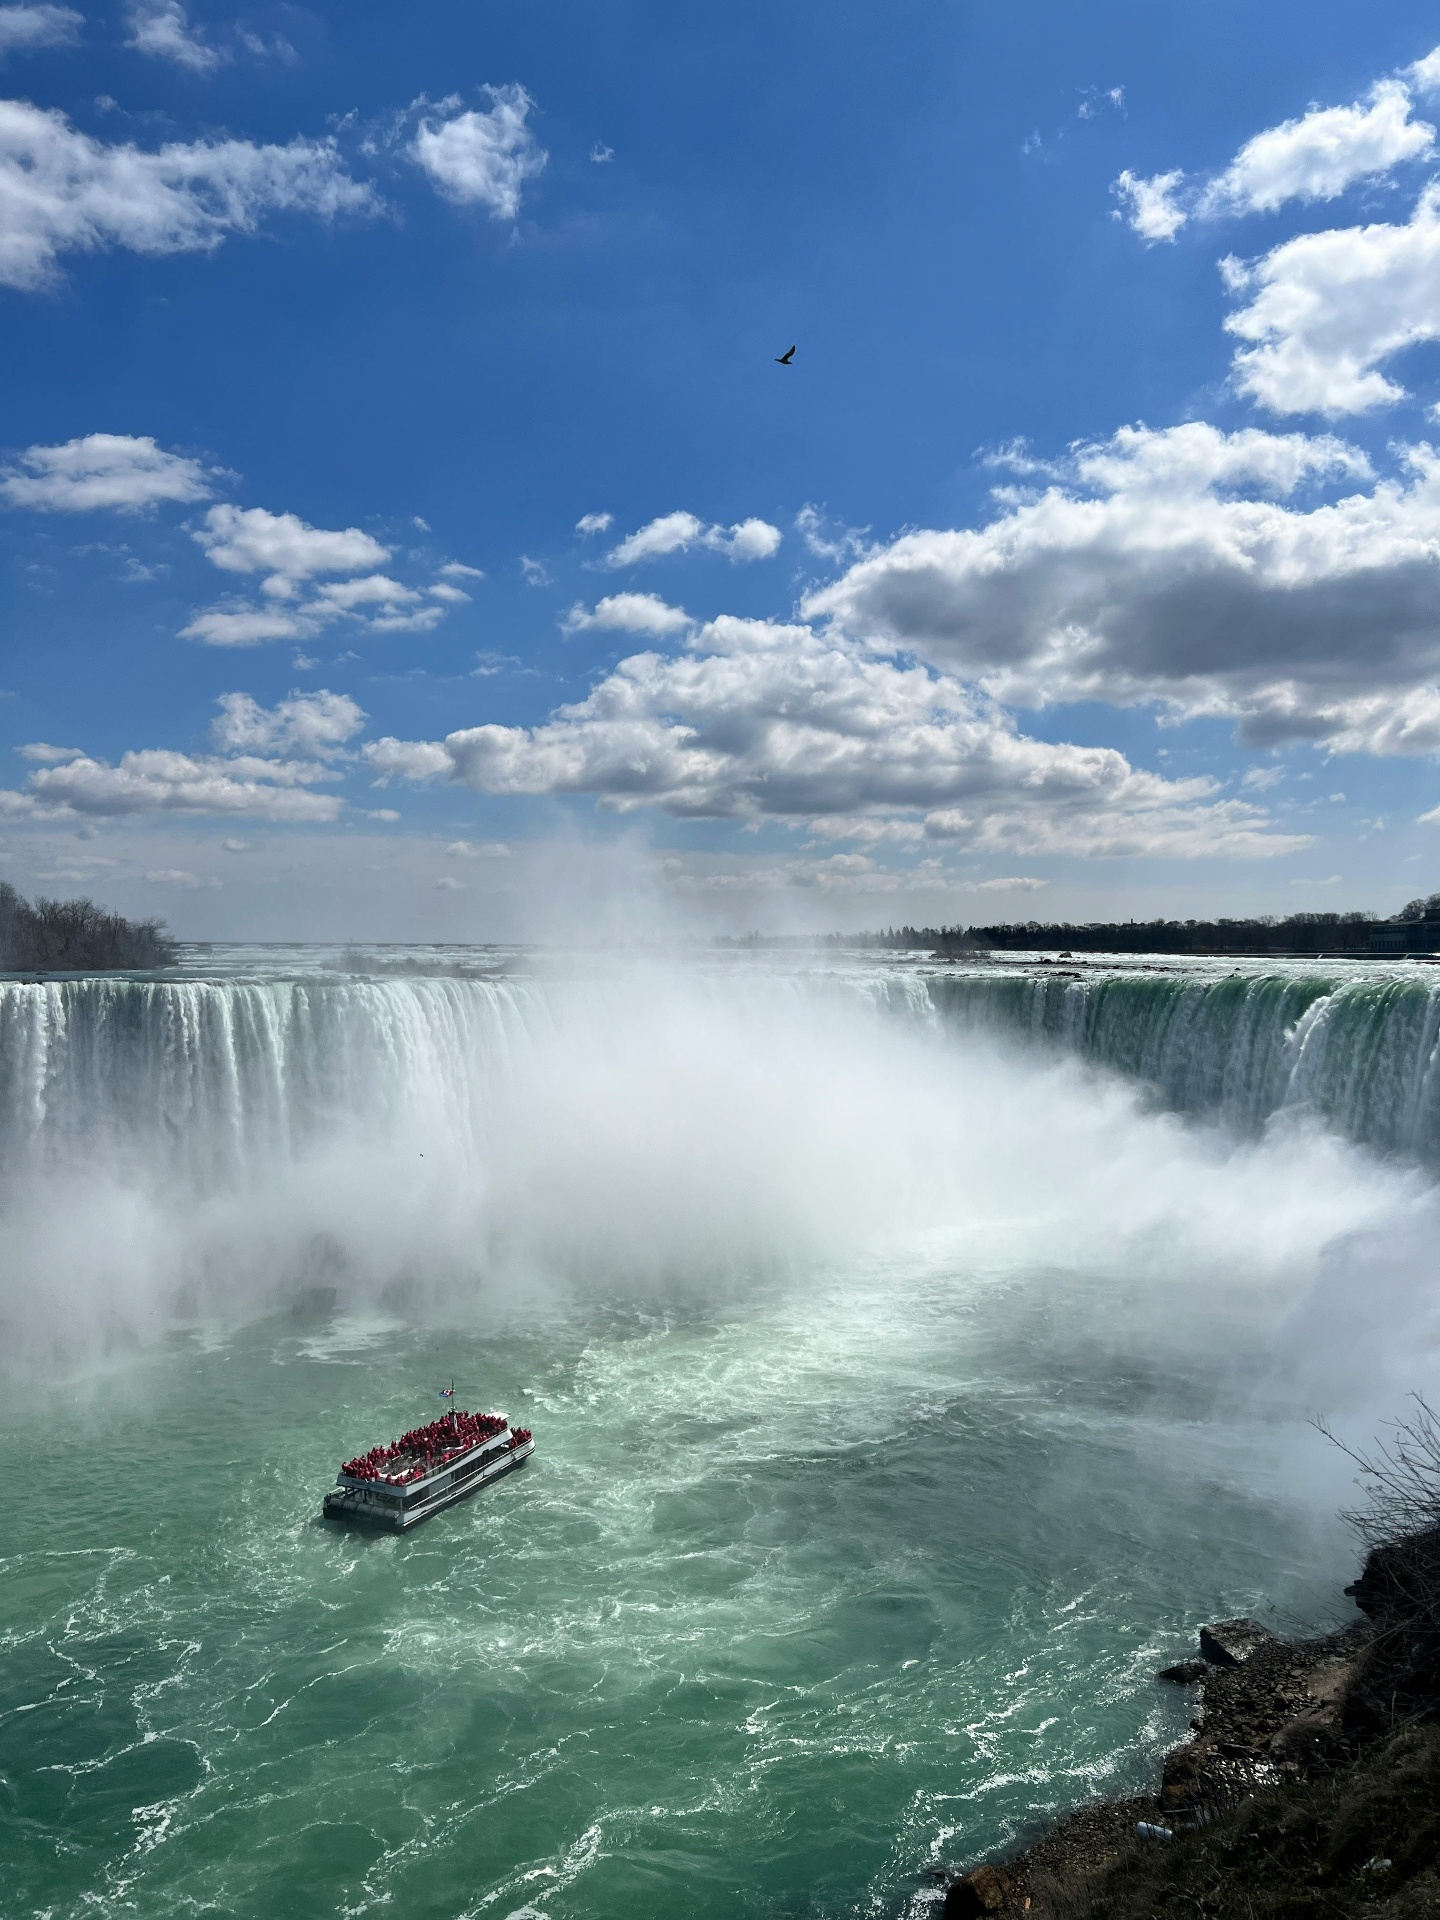
Most photos of Niagara look the same — a wide, flat shot from the railing at Table Rock, taken at noon, with a thousand other tourists in the frame. After three trips to the Canadian side I've stopped fighting that and started building around it. This is the field guide I wish someone had handed me the first time.
Why the Canadian side wins
Both sides are spectacular, but they offer different things. The American side gives you intimacy — you can walk right up to the lip of Bridal Veil and feel the mist in your teeth. The Canadian side gives you the postcard: a clean panorama of Horseshoe Falls with the city skyline behind you. For photography, the Canadian shore is the better workshop. You get distance, elevation options, and a long curving promenade that lets you compose from a dozen angles without moving your tripod more than 200 meters.
The four windows of good light
Niagara is a microclimate. The mist column changes the available light hour by hour, which means "good light" here is less about golden hour and more about wind direction. I plan around four windows:
- Pre-dawn (45 min before sunrise). The illumination floodlights on the falls are still on. Mist column glows. Empty railings. This is the only time you can shoot a long exposure of Horseshoe Falls without a stranger leaning into your frame.
- First light (sunrise to +30 min). Side-lit mist, warm gradient on the Niagara River. Best window for a clean shot of the Maid of the Mist / Hornblower boats as they leave the dock.
- Late afternoon (sunset −90 min). Sun rakes across the gorge from the west, lighting the face of Horseshoe Falls directly. If the wind is blowing the mist eastward, you get a rainbow that reliably appears around 4–6pm in summer.
- Blue hour into illumination. Stay through sunset. The falls are floodlit in a rotating color program — purple, white, gold, red. Compose during the white cycle if you want a natural-looking long exposure.
Five vantage points worth your time
- Table Rock Welcome Centre. The classic head-on shot of Horseshoe. Crowded by 10am — get there at sunrise or skip it.
- The promenade between Table Rock and Murray Hill. Walk south along the railing. Around 200m past Table Rock you get a three-quarter view that shows both the curve of the falls and the gorge below.
- Skylon Tower observation deck. Touristy, but the only easy way to get a top-down view of both falls in one frame. Pay the elevator fee, shoot at sunset, leave.
- Whirlpool Aero Car (3km north). The whirlpool downstream is shot much less often than the falls themselves and makes a great second-day subject.
- Dufferin Islands. A quiet wooded park five minutes from the chaos. Use it for soft-light portraits or rest-day cover photos.
Gear that earned its place in my bag
I shoot Niagara with a small kit. The mist is everywhere and salt-free water still kills electronics, so I want fewer lens changes, not more.
- One body, one weather-sealed 24–70mm. 90% of the keepers come from this lens.
- A circular polarizer. Cuts mist haze and saturates the rainbow at sunset.
- A 6-stop ND filter. For the silky long exposures that everyone wants of the drop, even mid-morning.
- A microfiber + a second microfiber. The first one is wet within two minutes. Plan accordingly.
- A lightweight travel tripod. The promenade railings are crowded; a bulky tripod makes you the obstruction.
Drone notice — read this before you fly
Don't. The entire Niagara Parks corridor on the Canadian side is a no-fly zone, and the U.S. side falls inside controlled airspace around Niagara Falls International Airport. Recreational flights are prohibited and Parks Police actively enforce. Aerial work here requires advance commercial authorization through Transport Canada and Niagara Parks, which can take weeks. If you want aerial footage of a waterfall in eastern Canada, fly somewhere else.
The shot most people miss
The single most underrated frame at Niagara is the view away from the falls, looking north along the gorge toward Rainbow Bridge at blue hour. The falls are behind you, the city of Niagara Falls, NY glows on the right, and the river runs cold and deep below. It's the only shot I've made there that doesn't look like a postcard — and it's the one editors keep buying.
Getting there and crossing the border
From Toronto, Niagara Falls is about 90 minutes by car on the QEW, or two hours on the GO train to Niagara Falls station — the train is the low-stress option and drops you a short WEGO bus ride from the falls. From Buffalo it's 30 minutes on the US side. Either way, arrive the evening before if you want sunrise; the first light of the day is the single most valuable hour here and nobody who day-trips ever gets it.
If you plan to shoot both sides, treat the border as a real cost, not a formality. Walking the Rainbow Bridge takes minutes but processing can take an hour in summer, and camera gear sometimes prompts questions about whether you're working. Have a clear answer ready: personal or editorial work is straightforward, paid commercial shoots need the right permissions on both sides.
Weather, mist and protecting your gear
Niagara has its own microclimate. The spray off Horseshoe Falls drifts hundreds of metres and reverses direction with the wind, so the Table Rock area is effectively light rain most days. Three things that saved shoots for me:
- A rain cover that actually fits the lens hood, not a plastic bag. You'll be shooting one-handed while wiping the front element with the other.
- Two microfibre cloths in separate pockets — one gets saturated within minutes and then just smears.
- A lens hood plus a clear filter you're happy to wipe repeatedly. Cleaning the filter forty times is better than doing it to your front element.
In winter, the bigger risk is condensation when you step back into a heated hotel. Seal the camera in a zip bag while still outside and let it warm up slowly before opening. Batteries drain fast below freezing; keep spares inside your jacket.
What to do beyond the falls themselves
Most visitors photograph the falls for two hours and leave, which means they miss the frames that make a set look like coverage rather than a postcard. The Niagara Whirlpool downstream, reached from the Whirlpool Aero Car or the Niagara Glen trails, gives you turquoise rapids and gorge walls with almost nobody in frame. Niagara-on-the-Lake, 20 minutes north, is a genuinely photogenic 19th-century town with vineyard light in the late afternoon. The Botanical Gardens and the old power station along the parkway both offer strong architectural and detail work when midday sun makes the falls unshootable.
Practical note on food and pacing: Clifton Hill is the tourist strip and the restaurants there are priced accordingly. Walk ten minutes inland for better and cheaper, and use midday — the worst light of the day — as your break rather than burning golden hour on lunch.
The falls set ended up being one of my most-downloaded groups of images. How I process and publish a trip like this is in my editing workflow, and the Pexels post covers what happens to the frames afterwards.
Niagara Falls FAQ
Which side of Niagara Falls is better for photos — Canada or the US?
Canada, by a wide margin. The Canadian side (Niagara Falls, Ontario) faces directly at the Horseshoe Falls; the American side looks along the top edge. Every classic wide shot you've seen was made from Canada. Cross the Rainbow Bridge on foot with your passport and a valid ETA/visa; parking on the Canadian side is expensive but worth it for a full day.
When is the best time of year to photograph Niagara Falls?
Late September through mid-October: the surrounding forest turns, the tourist crowds drop, and the mist rainbows still work. Winter (January–February) is dramatic — ice sculptures form along the American Falls — but bring cold-weather gear that goes well below freezing. Summer is peak crowd, and the shot is hard to compose without a hundred phones in the frame.
Can I fly a drone at Niagara Falls?
No. Both Niagara Falls State Park (US) and Niagara Parks (Canada) prohibit drone flight over the falls and immediate surrounding parkland. Transport Canada and the FAA both enforce it. The good news: the classic ground and boat-level compositions don't need aerial anyway.
Are the Maid of the Mist / Hornblower boats worth it?
Yes, once. The base-of-the-falls perspective is unlike anything else, but be prepared to soak your gear — bring a proper rain sleeve for the camera and a microfibre for the front element. Second visits I skip and shoot from the Journey Behind the Falls tunnels instead.
How long do I need at Niagara Falls?
A full day covers the Canadian side hero shots (Table Rock, Skylon, the Journey), sunset from the Canadian promenade, and a blue-hour walk back across the Rainbow Bridge. Two days lets you add the American side, the whirlpool downriver, and one boat trip.
Want to see the full Niagara set? It's live on my Pexels library. If you're a tourism board or operator in the region and want commissioned work, the contact page has my email.